Event page
The Event page of Local shows one event with its image, date and time, information rows, share buttons, ticket button and add to calendar links.
Applies to: Local 4.2.1 and later. Added in: Local 4.2.0. Last checked: 2026-10-13 against Local 4.2.1.
The Event page shows one event: its image, title and description, rows such as "When?" and "Where?", share links, a Buy ticket button and Add to calendar links. It is the event blog post template, built from the Event section and its blocks. Event posts of your events blog use it.
Where to find it: in the theme editor, open the template picker and select Blog posts → event, then select Event.
Local 4.2.1 does not include the event blog post template in its theme files, and the theme editor cannot create it: its section cannot be added with Add section. Without it, event posts open in the default blog post layout. If the template picker has no Blog posts → event template, contact Krown support.
The Event section has three fixed blocks, Content, Information and Actions, which you cannot remove or reorder. You add, remove and order the blocks inside Information and Actions. The date and time come from the metafields set in Theme settings → Events; see Events calendar.
Content
The Content block shows the event's featured image, its title, its tags and the full post content.
- Show featured image (on by default) and Media aspect ratio (Wide 16:9 by default; also Natural, 3:2, 4:3, 1:1 and 5:6) set the image.
- Show tags (on by default) shows the post's tags.
Information
The Information block holds the event details, as rows. Add these blocks inside it:
- Event time shows the date and the time range of the event under a Heading (default "When?"). It shows nothing on a post without a date.
- Text adds a free row with a Heading (default "Where?") and a Content text, for the venue, the organizer, the price or the dress code. Add one Text block per row.
- Share shows share links: Show Facebook, Show X, Show Pinterest and Show custom link (the device's own share menu), all on by default.
Actions
The Actions block holds the event buttons, side by side. Horizontal spacing between blocks sets Small or Regular space between them. It shows nothing when it has no blocks. Add these blocks inside it:
- Buy ticket sells the ticket product (see the steps below).
- Add to calendar opens a menu with the calendars you choose. Google Calendar, Apple Calendar (.ics) and Outlook Calendar are on by default; turn on Yahoo Calendar if you want it. Label is the button text (default "Add to calendar"). The button is hidden on a post without a date.
- Button is the standard Button block, for a link such as "Get directions"; see Button block.
Button style, Text and Accent set the look of the Buy ticket and Add to calendar buttons.
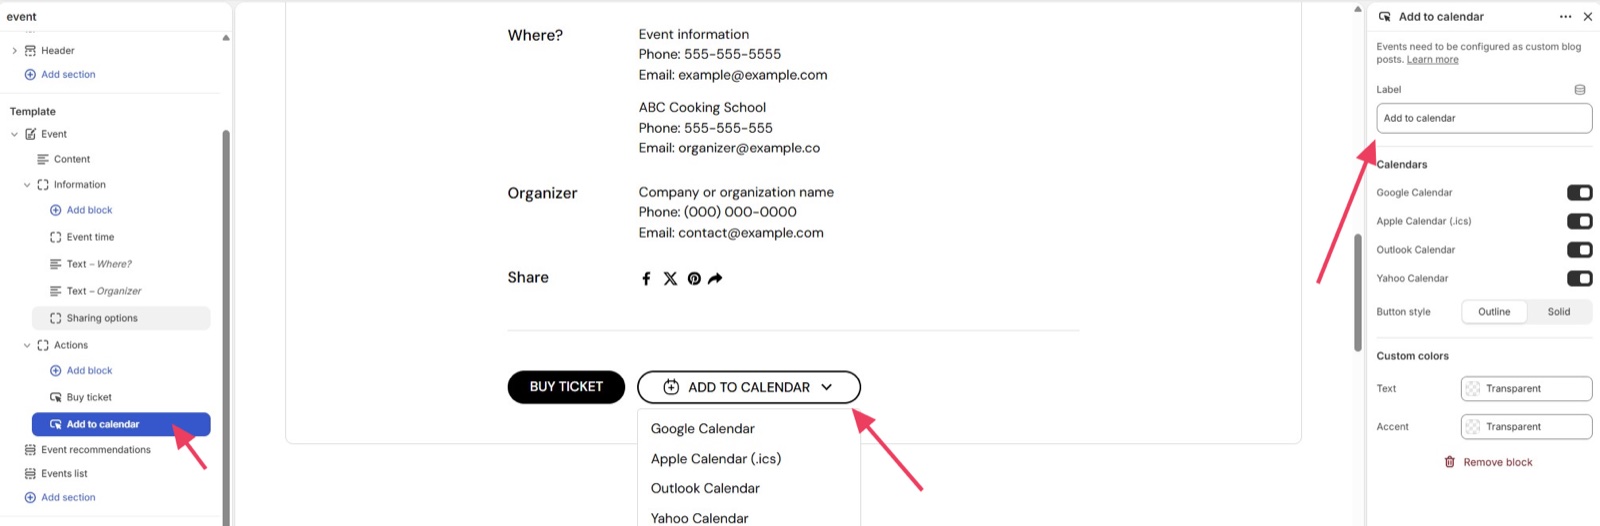
The Add to calendar block lets customers add an event to their preferred calendar:
- Google Calendar, Outlook and Yahoo: clicking the button opens the selected calendar with the event details, including the date, time and duration (when available). Customers can then save the event to their calendar.
- Apple Calendar (.ics): clicking the button downloads an
.icsfile containing the event details. The file can then be imported into Apple Calendar or another calendar application that supports the.icsformat.
For all-day events using a Date metafield, the calendar event is exported as an all-day event without a time.
The calendar event takes the post title as its name and the excerpt plus the event page link as its description. Without a duration, the calendar event has no length.
Connecting the ticket product
One event template serves every event, so the Buy ticket button reads the ticket from each post's product metafield.
Create the ticket product
In Shopify admin, create a product for the event's tickets, for example "Street Food Festival ticket". The steps for ticket types and the number of seats are on Event ticket page.
Link it to the event post
Open the event post in Shopify admin and select the ticket product in the event product metafield, for example custom.event_product. Save.
Add the Buy ticket block
In the theme editor, open Blog posts → event → Event → Actions, select Add block and choose Buy ticket.
Connect Select product to the metafield
Select the Connect dynamic source icon next to Select product and choose the event product metafield. Change the Button label if you want, then select Save.
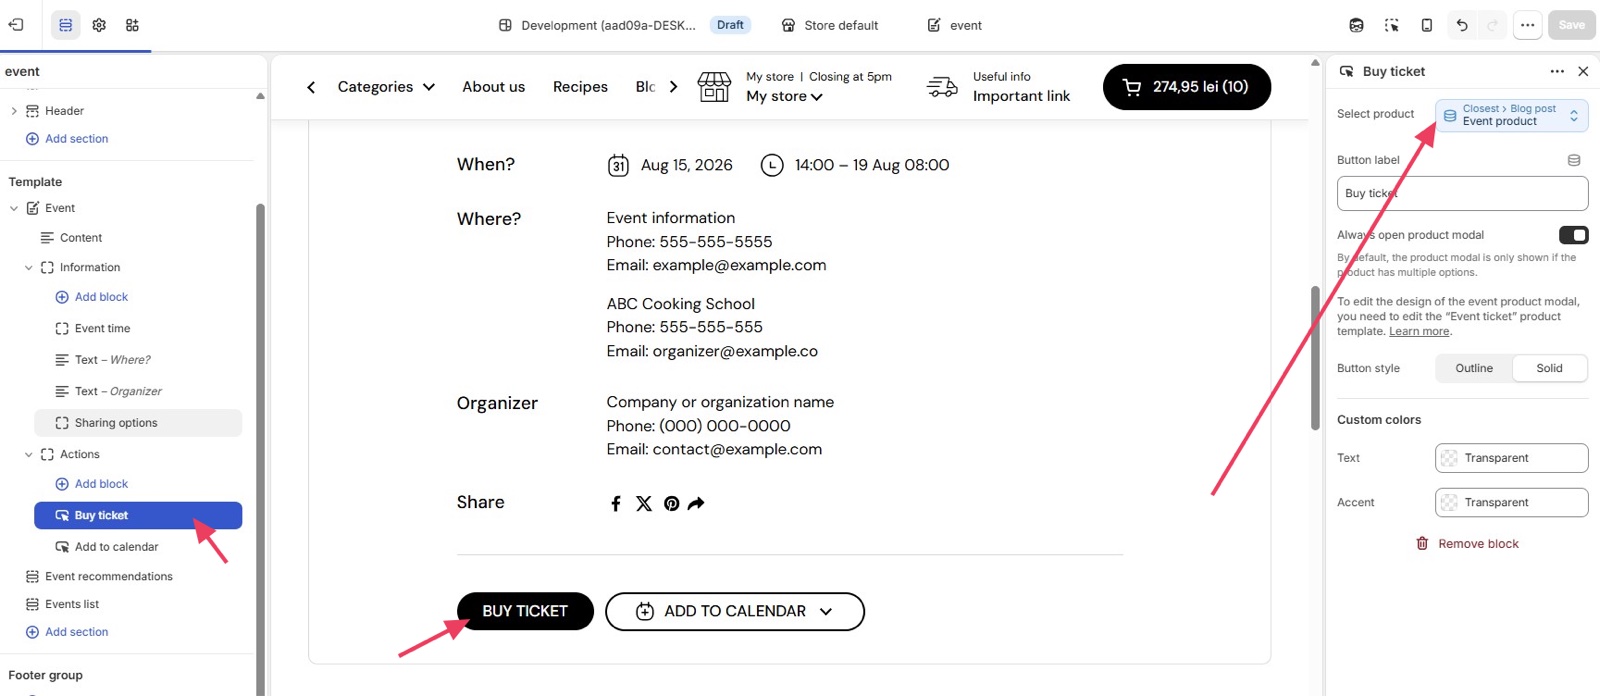
How the button behaves:
- A ticket product with one variant is added to the cart straight away.
- A ticket product with variants opens the ticket popup, where customers pick the ticket type and quantity. Turn on Always open product modal to open the popup for every ticket. The popup is built from the event-ticket template; see Event ticket page.
- A sold out ticket shows a disabled "Sold out" button.
- A post without a ticket product shows no button.
The ticket product keeps its normal product template. Do not assign the event-ticket template to it.
Showing event recommendations
Show other events under each event with an Events list section on the event template. It always leaves out the event being viewed.
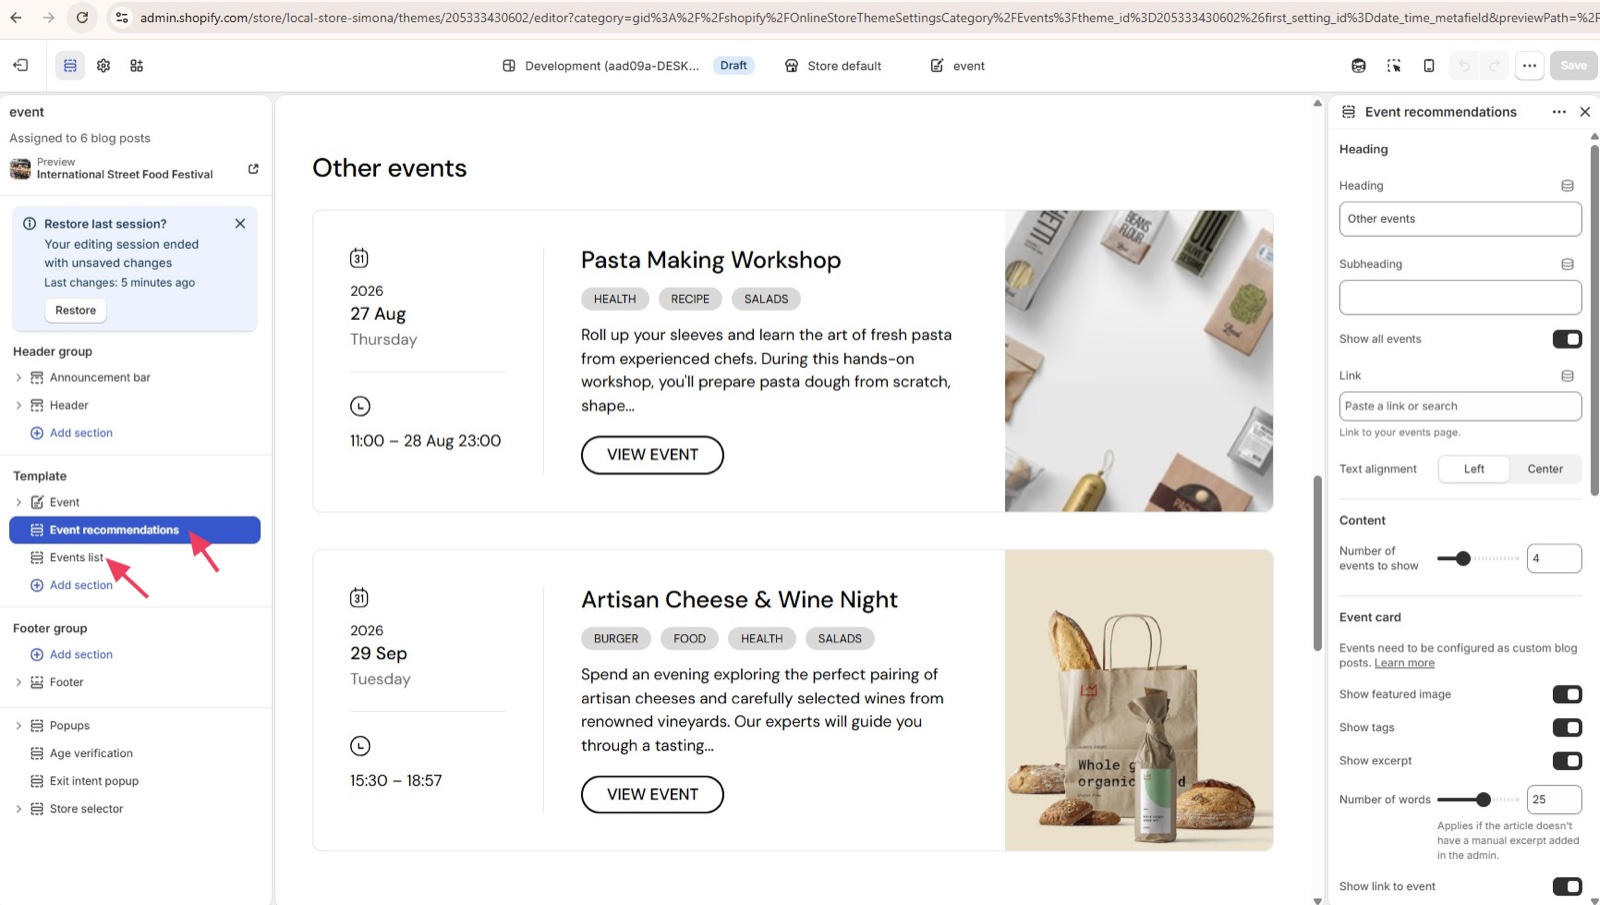
Add an Events list section
In the theme editor, open Blog posts → event, select Add section below the Event section and choose Events list.
Choose the blog and the number
Select your events blog in Events blog, set Number of events to show, for example 2, and change the Heading, for example to "Other events".
Hide past events
Turn on Hide past events. It is off by default, and past events then come first in the list.
Link to all events
Turn on Show section link, type a Link text such as "All events" and select your events page in Link. Select Save.
Which calendars does Add to calendar support?
Google Calendar, Apple Calendar, Outlook Calendar and Yahoo Calendar. Google, Outlook and Yahoo open the calendar's new event page in a new tab, filled with the event. Apple Calendar downloads an .ics file that most calendar apps can import. Choose which ones show under Calendars in the Add to calendar block.
Why is the time on the event page wrong?
Because the times print in your store's time zone, in 24-hour format. Check the time zone in Shopify admin → Settings → General, and the time you typed in the post's date metafield. The calendar export uses the same clock time without a time zone, so the customer's calendar shows the same hour wherever they are.
All Event page settings
Every setting of the Event section and its blocks, with its type and default.
The Event section has no settings of its own in Local 4.2.1.
Where to find it: Event → Content.
Show featured image (checkbox, default: on): Shows the post's featured image above the title.
Media aspect ratio (dropdown, default: Cropped: Wide (16:9)). Options: Uncropped: Natural, Cropped: Wide (16:9), Cropped: Shorter (3:2), Cropped: Short (4:3), Cropped: Square (1:1), Cropped: Tall (5:6). Shown only when Show featured image is on.
Show tags (checkbox, default: on): Shows the post's tags under the title.
Where to find it: Event → Information.
Accepts these blocks: Event time, Text and Share.
The Information block has no settings of its own in Local 4.2.1.
Where to find it: Event → Information → Event time.
Events need to be configured as custom blog posts. See Events calendar.
Heading (text field, default: "When?"): The row heading above the event date and time range. The block shows nothing on a post without a date.
Where to find it: Event → Information → Text.
Heading (text field, default: "Where?"): The row heading, for example Where? or Organizer.
Content (rich text, default: "Event information Phone: 555-555-5555 Email: example@example.com"): The row text, for example the venue address.
Where to find it: Event → Information → Share.
Show Facebook (checkbox, default: on).
Show X (checkbox, default: on).
Show Pinterest (checkbox, default: on).
Show custom link (checkbox, default: on): Adds a Share link that opens the device's share menu; browsers without one show Copy to clipboard.
Where to find it: Event → Actions.
Accepts these blocks: Button, Buy ticket and Add to calendar.
Horizontal spacing between blocks (dropdown, default: Small): Sets the space between the buttons inside Actions. Options: Small, Medium.
Where to find it: Event → Actions → Buy ticket.
Select product (product picker): The ticket product. Connect it to the blog post's product metafield, so each event sells its own ticket. The button is hidden when it is empty and shows Sold out when the product is sold out.
Button label (text field, default: "Buy ticket").
Always open product modal (checkbox, default: off): Opens the ticket popup for every ticket product. When off, a ticket product with one variant is added to the cart straight away.
To edit the design of the event product modal, you need to edit the “Event ticket” product template. See Events calendar.
Button style (dropdown, default: Solid). Options: Outline, Solid.
Buy ticket block: Custom colors
Where to find it: Event → Actions → Buy ticket → Custom colors
Text (color, default: transparent).
Accent (color, default: transparent).
Where to find it: Event → Actions → Add to calendar.
Events need to be configured as custom blog posts. See Events calendar.
Label (text field, default: "Add to calendar"): The button text. The button is hidden when it is empty or when the post has no date.
Add to calendar block: Calendars
Where to find it: Event → Actions → Add to calendar → Calendars
Google Calendar (checkbox, default: on): Opens Google Calendar's new event page in a new tab, filled with the event.
Apple Calendar (.ics) (checkbox, default: on): Downloads an .ics file with the event, for Apple Calendar and other calendar apps.
Outlook Calendar (checkbox, default: on): Opens Outlook Calendar's new event page in a new tab, filled with the event.
Yahoo Calendar (checkbox, default: off): Opens Yahoo Calendar's new event page in a new tab, filled with the event.
Button style (dropdown, default: Outline). Options: Outline, Solid.
Add to calendar block: Custom colors
Where to find it: Event → Actions → Add to calendar → Custom colors
Text (color, default: transparent).
Accent (color, default: transparent).
Related pages
- Events calendar: the whole events setup, metafields and Theme settings → Events.
- Event ticket page: the ticket popup.
- Events list section: events by date, on the events page and under each event.
- Button block: the Button block in Actions.