Popups section
The Popups section of Local adds cookie, image, newsletter and custom popups, with delay, scroll trigger, page visibility and frequency settings.
Applies to: Local 4.2.1 and later. Added in: Local 1.0.0. Last checked: 2026-10-13 against Local 4.2.1.
The Popups section adds small popups to your store, to announce news and sales, collect email addresses or ask for cookie consent. Each popup is a block. Popups appear in a bottom corner of the screen, stacked on top of each other when several are open.
Where to find it: Popups (Theme editor sidebar, after the Footer group)
Age verification and the exit intent popup are separate sections, see Age verification section and Exit intent popup section.
Popup blocks
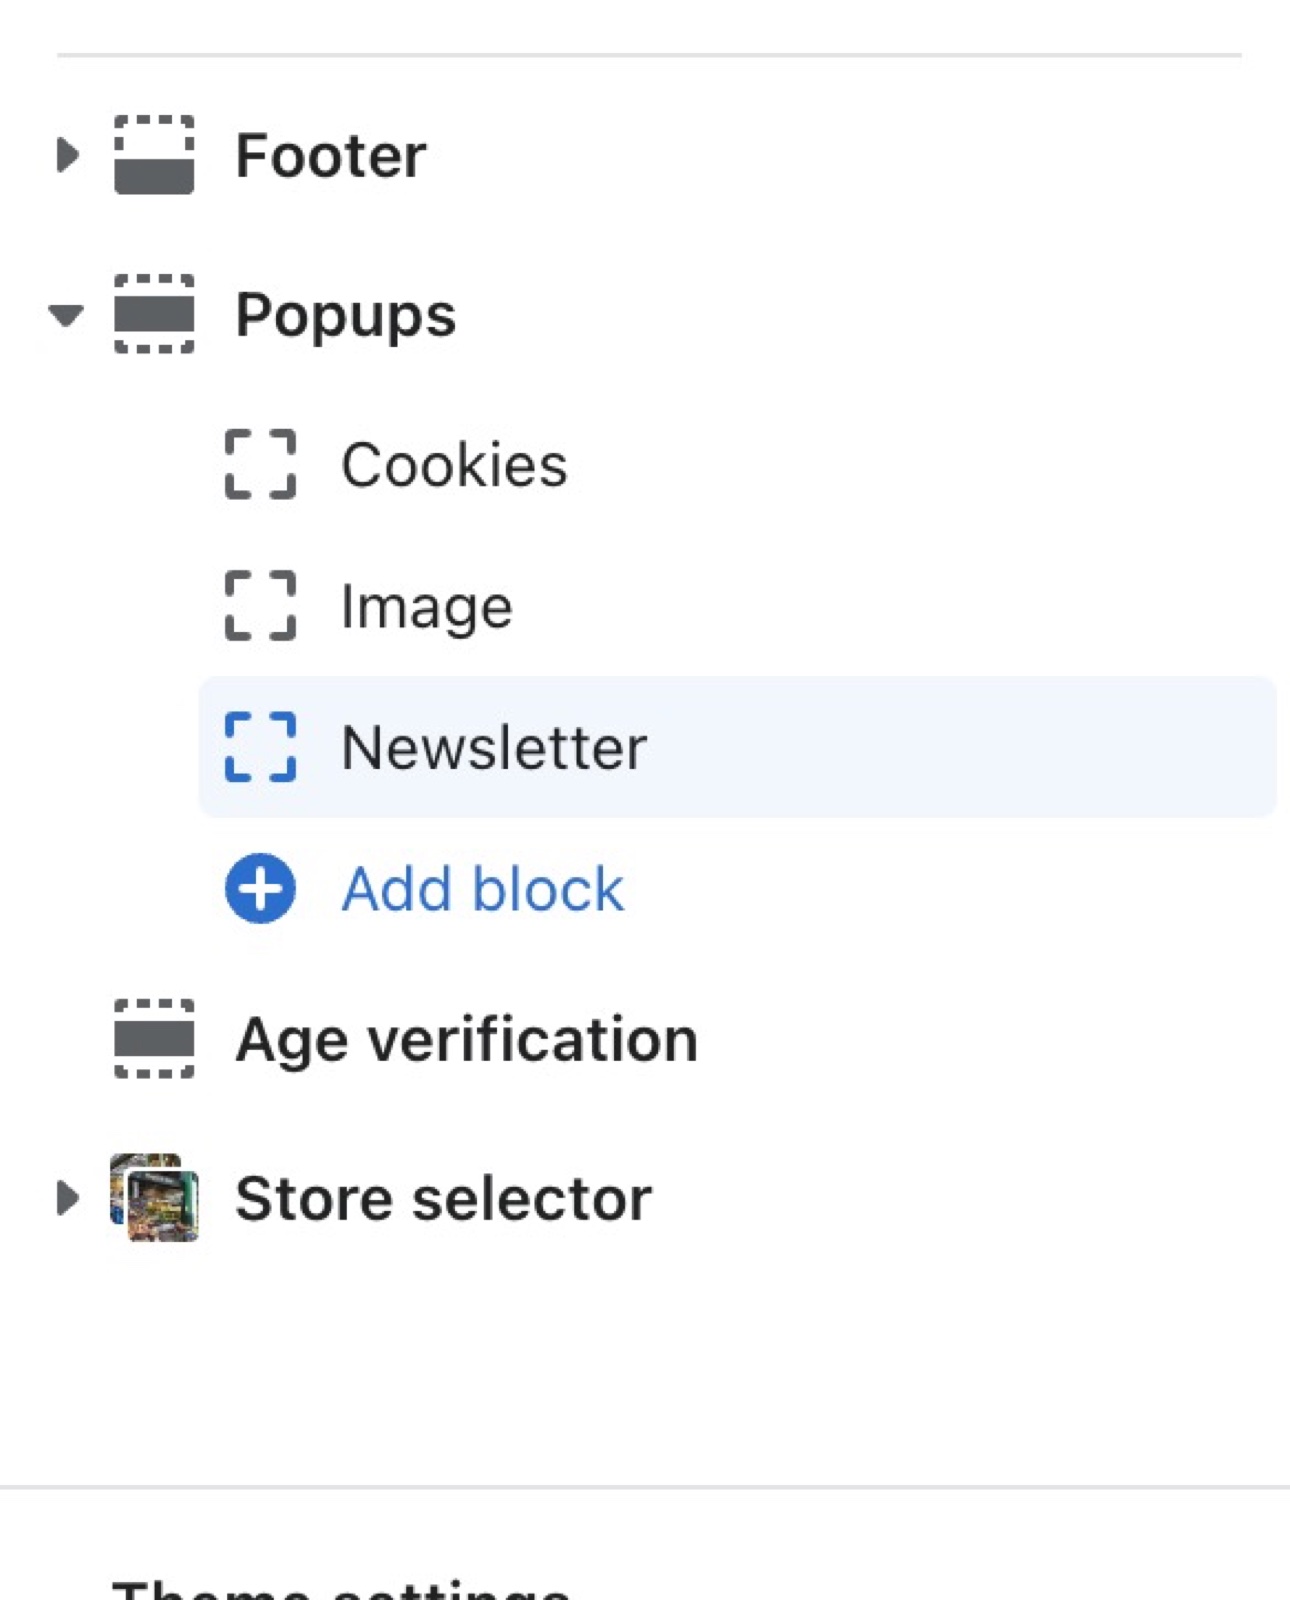
- The Popups section is part of every page. Select it in the theme editor sidebar and choose Add block to add a popup: Cookies, Image, Newsletter or Custom.
- You can add one Cookies, one Image and one Newsletter block, and as many Custom blocks as you need (up to 12 blocks in total).
- Radius rounds the corners of all popups, from 0 to 30 px.
- Position puts the popups in the bottom left or the bottom right corner (default) of the screen.
In the theme editor, popups do not open by themselves: select a block to preview it.
Cookies popup
The Cookies popup asks customers to accept or decline cookies. It has Accept all cookies and Decline all cookies buttons, and passes the answer to Shopify's customer privacy settings.
- It shows on every page until the customer selects one of the two buttons; after that it never comes back in that browser.
- It has no delay, frequency or visibility settings, only Background color and Text color.
- Edit its texts ("Cookies", the message and the two button labels) in Shopify admin → Online Store → Themes → … → Edit default theme content, under Cookies popup.
The Cookies popup shows to every customer who has not answered yet, in every country. It does not check your Shopify customer privacy settings or the customer's region, although the editor's help text says it does. If Shopify's own cookie banner or a consent app is also on, customers see two banners.
For other cookie options, see Cookie consent popup and Cookie banner apps for GDPR compliance.
Image popup
The Image popup shows a picture, for example a promotion banner, that can link to a page of your store.
- Image is the picture; Link makes it clickable, and Open link opens the link on the same page or in a new page.
- Popup size makes the popup Small or Large.
Newsletter popup
The Newsletter popup collects email addresses.
- Heading and Content are the title and the text above the email field.
- When a customer subscribes, the page reloads and the popup shows a thank-you message. The email is saved in Shopify admin → Customers as a subscriber, with the tag
newsletter.
Custom popup
The Custom popup is a simple text popup.
- Heading and Content are its title and text. Content is rich text, so it can hold links, for example to a sale.
- Popup size makes the popup Small or Large.
When popups appear
The Image, Newsletter and Custom popups share the same trigger settings. Turn each popup on with Enable popup.
- Show popup after sets the delay before the popup opens, from 1 to 60 seconds. The defaults are 1 second for Image, 5 for Newsletter and 10 for Custom.
- Enable scroll based trigger waits until the customer scrolls down the page. Scroll position sets how far, from 0 to 100 percent of the page; the delay starts counting when the customer gets there.
- Popup frequency sets how long Local waits before showing the popup again to a customer who closed it: Show each day, Show each week (default) or Show each month.
- Visibility chooses the pages: All pages, Homepage only, Product pages only, Cart page only, or All pages except the homepage.
In Local 4.2.1, Show each month shows the popup only once: after the customer closes it, it does not come back in that browser.
The frequency is remembered in the customer's browser, per device. A customer on another device or browser sees the popup again.
Setting up a popup
Add the popup block
In the theme editor, select Popups in the sidebar and choose Add block, then Image, Newsletter or Custom.
Fill in the content
Upload the Image (Image popup), or write the Heading and Content (Newsletter and Custom popups). Set Popup size, Background color and Text color where the block has them.
Choose when it opens
Set Show popup after. To wait until the customer scrolls, turn on Enable scroll based trigger and set Scroll position.
Choose how often and where
Set Popup frequency and Visibility.
Turn it on
Turn on Enable popup and select Save. Open your store in a private browser window to see the popup as a new customer.
Showing several popups
Give each popup its own delay
Set very different Show popup after values, for example 5 seconds for the Newsletter popup and 40 seconds for a Custom popup.
Spread them with the scroll trigger
Turn on Enable scroll based trigger for one of them, so it waits until the customer scrolls down the page.
Limit them to different pages
Use Visibility to keep popups apart, for example one on the home page only and one on product pages only.
If you're using multiple popups, make sure that you set a long time difference between them (in seconds), so that they don't appear all at once and overwhelm the customer.
Why does my popup not show again?
Because the customer closed it, and Local remembers that in their browser for the Popup frequency period. To test it again, open your store in a private browser window or clear your browser's site data. Note that Show each month shows a popup only once in Local 4.2.1.
Why does the cookies popup not come back?
Because the customer already selected Accept all cookies or Decline all cookies. Local remembers the answer in their browser and does not ask again. To see it again yourself, use a private browser window.
Does a changed popup show again to customers who closed it?
No. Local remembers the popup block, not its text. Customers who closed it see it again only when the frequency period is over. To show a new message to everyone, delete the block and add a new one.
All Popups settings
Every setting, with its type and default, including the settings of each popup block.
Accepts these blocks: Image, Cookies, Newsletter and Custom (up to 12 blocks in the section).
Radius (slider 0 to 30 px, default: 0 px): Sets the corner rounding of all popups.
Position (dropdown, default: Right): Puts the popups in the bottom left or bottom right corner of the screen. Options: Left, Right.
Image block
Where to find it: Popups → Add block → Image
One Image block per section.
Enable popup (checkbox, default: off): Turns the popup on. In the theme editor, the popup shows when you select its block, even when off.
Show popup after (slider 1 to 60 s, default: 1 s): Sets the delay before the popup opens, in seconds. With the scroll trigger on, the delay starts when the customer reaches the scroll position.
Enable scroll based trigger (checkbox, default: off): Waits until the customer scrolls down the page before the delay starts.
Scroll position (slider 0 to 100 %, default: 50 %): Sets how far down the page the customer must scroll, in percent of the page. Shown only when Enable scroll based trigger is on.
Popup frequency (dropdown, default: Show each week): Sets how long Local waits before showing the popup again to a customer who closed it, per browser. In Local 4.2.1, Show each month shows it only once. Options: Show each day, Show each week, Show each month.
Visibility (dropdown, default: All pages): Sets the pages that show the popup. Options: All pages, Homepage only, Product pages only, Cart page only, All pages except the homepage.
Image block: Content
Where to find it: Popups → Add block → Image → Content
Image (image): Sets the picture of the Image popup.
Link (link): Makes the image a link.
Open link (dropdown, default: On the same page): Opens the link on the same page or in a new page. Options: In a new page, On the same page.
Popup size (dropdown, default: Small): Sets the size of the Image popup. Options: Small, Large.
Cookies block
Where to find it: Popups → Add block → Cookies
One Cookies block per section.
The cookies popover will only be visible if it customer data is set to be collected after consent.
Cookies block: Colors
Where to find it: Popups → Add block → Cookies → Colors
Background color (color, default: #111111): Sets the background color of the Cookies popup. Its texts are edited in Edit default theme content → Cookies popup.
Text color (color, default: #ffffff).
Newsletter block
Where to find it: Popups → Add block → Newsletter
One Newsletter block per section.
Enable popup (checkbox, default: off): Turns the popup on. In the theme editor, the popup shows when you select its block, even when off.
Visibility (dropdown, default: All pages): Sets the pages that show the popup. Options: All pages, Homepage only, Product pages only, Cart page only, All pages except the homepage.
Show popup after (slider 1 to 60 s, default: 5 s): Sets the delay before the popup opens, in seconds. With the scroll trigger on, the delay starts when the customer reaches the scroll position.
Enable scroll based trigger (checkbox, default: off): Waits until the customer scrolls down the page before the delay starts.
Scroll position (slider 0 to 100 %, default: 50 %): Sets how far down the page the customer must scroll, in percent of the page. Shown only when Enable scroll based trigger is on.
Popup frequency (dropdown, default: Show each week): Sets how long Local waits before showing the popup again to a customer who closed it, per browser. In Local 4.2.1, Show each month shows it only once. Options: Show each day, Show each week, Show each month.
Newsletter block: Content
Where to find it: Popups → Add block → Newsletter → Content
Heading (text field, default: "Newsletter"): Sets the title of the Newsletter popup.
Content (rich text, default: "Subscribe and receive exclusive information and offers!"): Sets the text above the email field. After subscribing, the popup shows a thank-you message instead.
Newsletter block: Colors
Where to find it: Popups → Add block → Newsletter → Colors
Background color (color, default: #111111).
Text color (color, default: #ffffff).
Custom block
Where to find it: Popups → Add block → Custom
Enable popup (checkbox, default: off): Turns the popup on. In the theme editor, the popup shows when you select its block, even when off.
Visibility (dropdown, default: All pages): Sets the pages that show the popup. Options: All pages, Homepage only, Product pages only, Cart page only, All pages except the homepage.
Show popup after (slider 1 to 60 s, default: 10 s): Sets the delay before the popup opens, in seconds. With the scroll trigger on, the delay starts when the customer reaches the scroll position.
Enable scroll based trigger (checkbox, default: off): Waits until the customer scrolls down the page before the delay starts.
Scroll position (slider 0 to 100 %, default: 50 %): Sets how far down the page the customer must scroll, in percent of the page. Shown only when Enable scroll based trigger is on.
Popup frequency (dropdown, default: Show each week): Sets how long Local waits before showing the popup again to a customer who closed it, per browser. In Local 4.2.1, Show each month shows it only once. Options: Show each day, Show each week, Show each month.
Custom block: Content
Where to find it: Popups → Add block → Custom → Content
Heading (text field, default: "Popup"): Sets the title of the Custom popup.
Content (rich text, default: "Stay up to date on the latest product releases, special offers & news by signing up for our newslet…"): Sets the text of the Custom popup. It can hold links.
Popup size (dropdown, default: Small): Sets the size of the Custom popup. Options: Small, Large.
Custom block: Colors
Where to find it: Popups → Add block → Custom → Colors
Background color (color, default: #111111).
Text color (color, default: #ffffff).
Related pages
- Age verification section: a full-screen popup that asks customers to confirm their age.
- Exit intent popup section: a popup when the customer is about to leave.
- Troubleshoot the header, menus and popups: popups that do not show or show too often.
- Email signup section: a newsletter form as a section.
Footer group
The Footer group of Local holds the Footer section with text, menus, images, payment icons and an email signup, plus any section you add.
Age verification
The Age verification section of Local blocks the store behind a popup until the customer confirms their age, with your own text and colors.